Hanging drywall might seem intimidating at first, but with the right approach, it’s easier than you think to achieve polished, professional results, even if you’re a beginner. Think of it as a puzzle where the right tools, techniques, and a little know-how come together to create a flawless finish.
This guide will walk you through the process in full, sharing insider tips, common mistakes to avoid, and other information to make drywall installation easier.
Choose the Right Drywall for the Job
Standard drywall is suitable for most interior walls and ceilings, but other options are available for unique circumstances. For moisture-prone areas like bathrooms or basements, opt for moisture-resistant or green board drywall to prevent mold growth.
Fire-resistant drywall is ideal for garages or utility spaces where safety is a priority. Additionally, soundproof drywall is best for offices, homes located near major roads, or nurseries.
Use the Score-and-Snap Method
Cutting drywall may seem intimidating, but the score-and-snap method keeps it simple and efficient. Using a utility knife, score the drywall along the measured line, making sure to use a straightedge for precision.
Once you’ve made the cut, firmly snap the drywall along the line by applying pressure. This approach is beginner-friendly and minimizes messes while allowing you to work faster. Always cut carefully and measure twice to avoid unnecessary mistakes or waste.
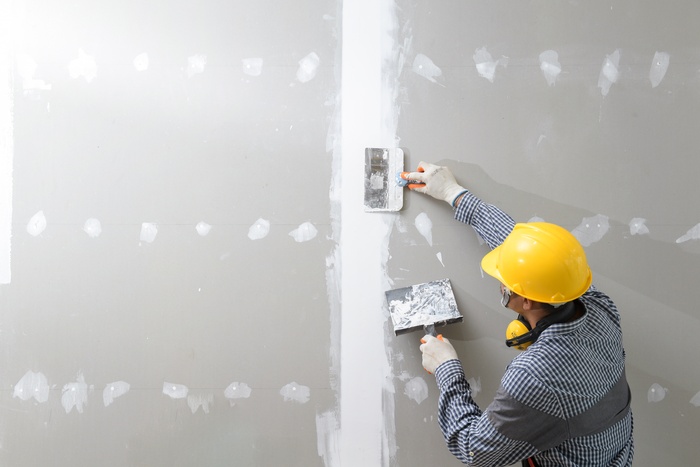
Invest in Quality Joint Tape
A smooth and easy drywall installation relies on using joint tape. Paper tape is a common choice, but for beginners, self-adhesive fiberglass mesh tape can be easier to install. This type of tape adheres directly to the seams and provides extra durability, reducing the chances of cracking over time.
Regardless of your choice, applying the tape correctly is key. Double-check that the tape sits flat and smoothly across the joints to avoid imperfections in the finish.
Use a Rasp for Clean Edges
Jagged or uneven edges on drywall can lead to poor fits at seams, making installation harder and detracting from the appearance of the final product. A drywall rasp is an essential tool every drywaller needs to smooth out rough edges quickly and effectively.
After snapping the drywall to size, use the rasp to shave down bumps or inconsistencies. This small step goes a long way toward creating tight-fitting panels that make taping, mudding, and finishing a breeze.
Install in Horizontal Rows When Possible
When installing drywall, placing panels horizontally rather than vertically is often the better approach, especially on walls. Horizontal installation reduces the number of seams, as the standard four-foot height of drywall covers more width at once on an eight-foot wall.
Fewer seams mean less taping, mudding, and sanding, saving time and effort while also producing a cleaner finish. Additionally, horizontal rows provide stronger structural support and make it easier to align seams at a comfortable working height.
With these steps, you’ll be well on your way to achieving a smooth, polished finish that you can be proud of. Don’t stress over minor imperfections; every project is a learning opportunity.